 Reading Time: 4 minutes read
A couple of weeks ago, I told you about QuestionPro’s new quiz and score feature — have you checked it out yet? I did. After all, this was a feature I’ve been waiting for – so I wanted to put it to use. In the article, I told you that one of the potential uses for a quiz and score feature would be to do an opportunity analysis.
Note: This feature is currently available to Corporate accounts and above.
This was going to be my experiment! I have a client that has just created a new opportunity analysis for their growing business. We were looking for ways to take on the right business and find the right customers consistently. Not only that, but we wanted to keep a record of the different opportunities that were coming in so that we can evaluate them later.
The quiz and scoring feature looked to be a great answer to my problem. And today – I’m going to tell you how it works.
Create your questionnaire
This is truly the easy part because there is nothing new to do or learn. Simply create your questions the way you normally would. This only took about 10 minutes since I already had the questions ironed out.
Here’s a tip — it’s not a bad idea to map out your questionnaire on paper or as a process map. This will help you see all the different moving pieces and parts and make it easier for you to do the calculations and logic that will come later.
Assign scores to each of your answers
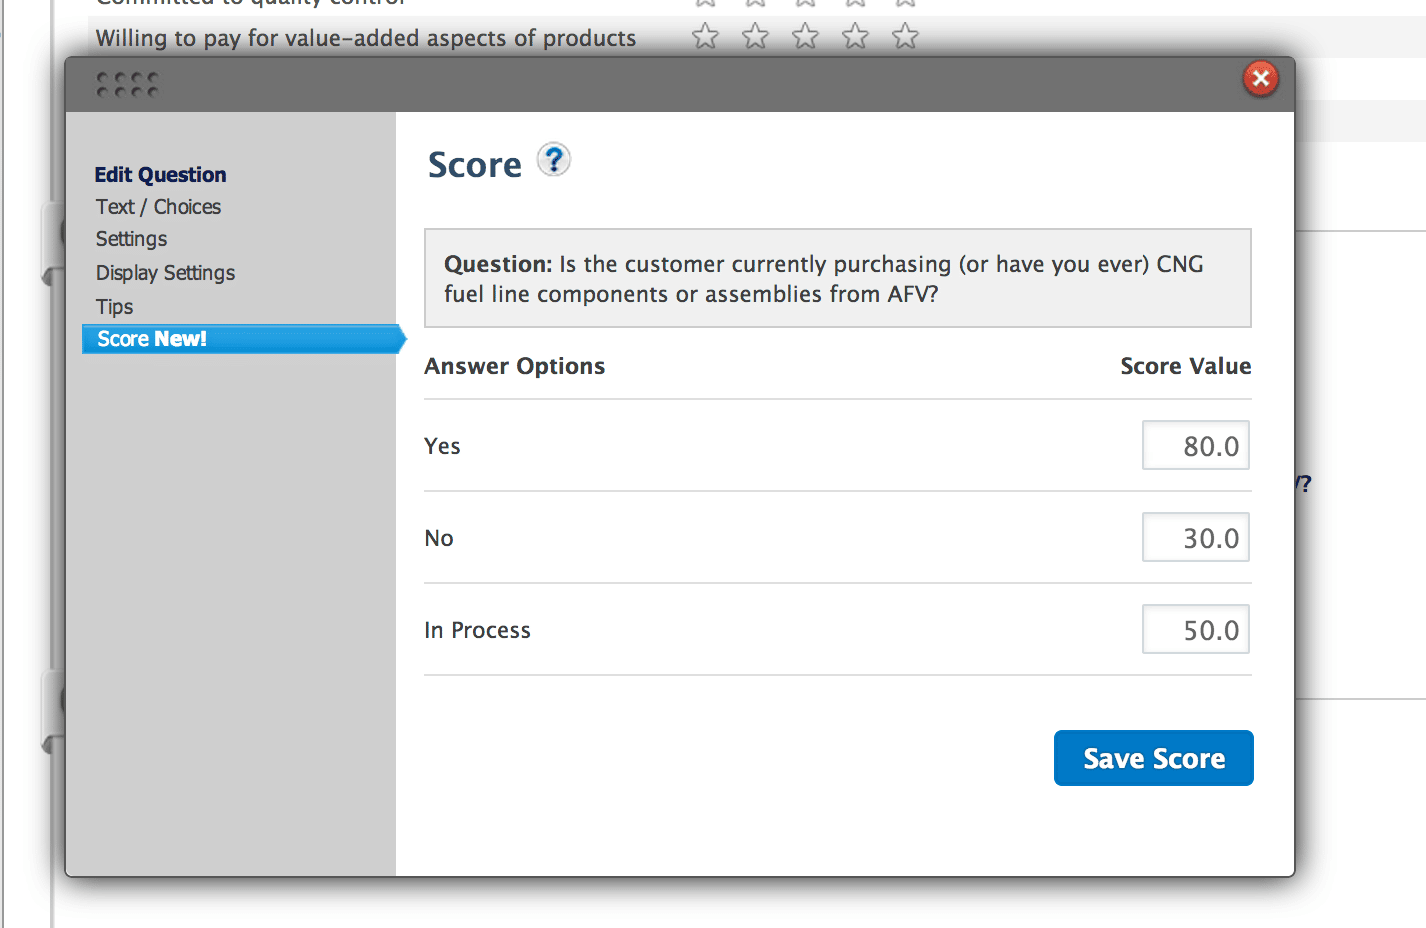
Now that you have all your questions and answers laid out, you’re ready to assign scores to the answer choices for each question. Here’s what that looks like:
If you were doing a quiz where there were right answers and wrong answers, then you would make each wrong answer worth zero and the right answer worth a certain amount of points. But you don’t have to do that. You can see that in my opportunity analysis example, I’m giving different scores to different answers. This is because I’m trying to gauge the attractiveness of an opportunity – so it’s not a yes/no option.
If you’re doing a personality assessment or some kind of inventory, then you, too will want to use the option of giving different scores to different answers. You should also recognize that this does insert a certain level of complexity to your survey. I’ll get into that in the next section.
LEARN MORE ABOUT: Personality Survey
Tabulating the results
I’m not going to kid you — this is where you’re going to have to do some work. I have to admit that I struggled a bit with this part of the process. It isn’t magic and it isn’t going to create itself — for basic scoring logic you can use a couple of tricks that work well; for more complex logic it may take a little scripting/programming work.
Here’s how it might work for a basic personality assessment (no custom scripting or programming was used in the below example) so you can see how you might setup scoring logic when it’s not a simple zero-sum answer:
Step 1: Create the survey questions as I mentioned above.
Step 2: For each question that involves scoring, click “Edit” and assign a score to each answer as shown in the above screenshot.
Step 3: At the end of all of your personality questions, insert a “Presentation Text” question type, and leave the “Terms / Acceptance CheckBox” requirement un-checked (we’re not going to require it). Essentially this is a ‘dummy’ question that triggers the calculation of the score once the respondent hits “Continue.”

Step 5: Once you have each of these questions added, now go back to the first presentation text question you created (in Step 3).
This is where we add our logic. Just add up the scores you assigned for your assessment question answers, and enter those ranges here. Then pick the corresponding page to jump to (this is why we created all of the presentation text question-types first, so we can now select them from the list). We’re assigning this logic on the ‘dummy’ question because we want the cumulative score, not the individual score for just one question.
For more general information on Quizzes and Scoring, here’s the general help file; for custom scripting information and examples, you can find that here.
And that is the short skippy on how to use quizes and scoring — give it a shot and let us know how it works for you!


