 Reading Time: 3 minutes read
February 24th is a day that will go down in…well, in the records of QuestionPro as being the date of one of our monthly Special Free Trainings. We had a great time talking about ways to personalize and customize surveys using QuestionPro. Let’s recap.
Personalization
 When we talk about personalization, we’re referring to ways that you can make the survey experience for a respondent all about them. We chatted about some best practices about personalization, especially at a time when people are nervous about how much information companies know about their customers. The basic rule of thumb: if you were taking the survey and would be a bit weirded out by how much information was piped in about you, then your respondents will more than likely feel the same way.
Including some information about your customers in their questionnaires can be a great way to speed up the survey-taking process, though. For example, do you know their first name? Last name? Are you asking about a recent purchase that you know about? Using custom variables, you can feed that information into the questions of your surveys so that respondents don’t have to fill it all out themselves. Just don’t cross the creeper line.
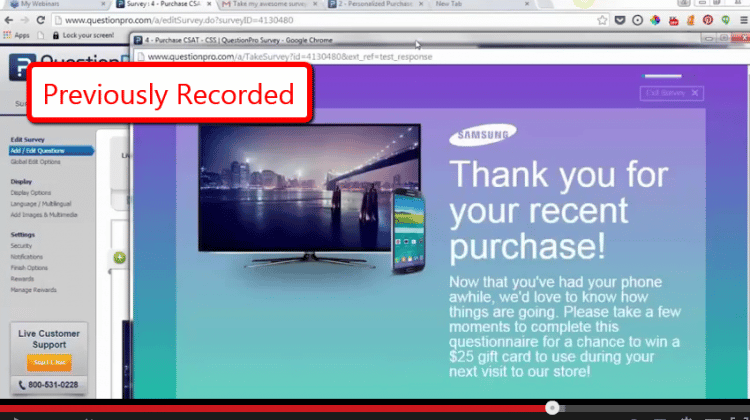
We started with a completely unpersonalized survey, then moved to a personalized survey that used custom variables. If you look at the survey, you’ll see where the custom variables were used: you’ll see ${custom1}, etc. We also set up a custom variable based on information entered by the respondent, then piped that into the rest of the survey (asking for the name they preferred to go by).
Customization
 The next step we took was customizing the survey. Here, the best practice is: make sure you’ve done all of the personalization first, then move to the customization. It’s best to have the survey basically ready to go before adding the bells and whistles.
The first stop on the customization train was to change the font and the theme colors. If you know the hex color values for your organization, you can just type those in where the existing hex values exist. This can be a simple, but pretty high-impact way to customize your survey. You can review the personalized and customized version of the survey where we changed the font and colors from the originals.
The last step in this demo was showing off a survey where we used full CSS control to update the survey. We also uploaded images into the image library and used them in the answer options. You’ll see how different this survey looks! A word of caution: the survey editor is a WYSIWYG (what you see is what you get) editor, so if you use a white or light-colored font for your survey, don’t be surprised when it looks like your survey is blank in the survey editor. Just hover over where the text should be, click, and you’ll see the text (or click “Edit” on the fly-out menu).
Wrap-up
This webinar packed a powerful 1-2 punch of personalization and customization. If you don’t click on any other links in this post, at least check out the original survey and the completely decked out survey. Hopefully this will inspire you to spend a little extra time implementing some or all of these techniques.
And if you’d like a personalized demo of some or all of the personalization and customization options, you can sign up for a 1-on-1 tour here.
And if you’d like to watch the process we went through step-by-step, here’s the recording:
Next up: we are debuting the Survey Respondent Score on March 17th!